
Digital embroidery has become a popular way to add intricate designs and digitize logos to clothing, hats, bags, and other textiles.
This involves using special software to convert your design into a digital file that can be read by an embroidery machine.
Although digitizing embroidery can seem like a complicated and difficult process, it doesn’t have to be. With the right tools and techniques, table digitization is easily accessible to everyone. Indeed, many digitizing programs offer easy-to-use interfaces and automation features that make the process even easier. In this blog, we’ll look at some ways to make digitizing embroidery easier, including using software, digitizing tips and tricks, and examples of successful digitizing patterns.
In this blog post, let’s understand the types, ease of use, and how the process is made easy. We will then see best practices, top-rated service, and how it is so easy for beginners to get started.
Understanding Embroidery Digitizing – Types
There are three main types of embroidery digitizing:
Embroidery digitizing offers three main types of embroidery techniques:
- Flat embroidery
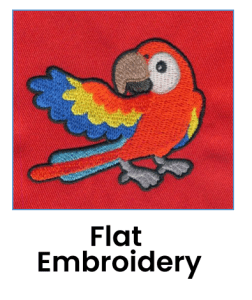
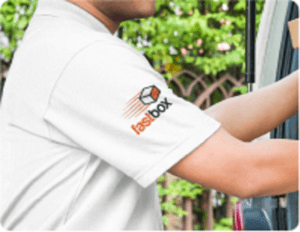
The most common type involves stitching a design onto a flat piece of fabric – that is digitizing a logo. What is a digitized logo? A digitized logo is a digital file created using specialized embroidery digitizing software that converts a logo or image into a format that can be read and executed by an embroidery machine. Well, this technique is often used for digitizing logos on polo shirts, hats, and jackets.
- 3D Puff embroidery

Creates a raised, 3D effect by adding foam padding underneath the stitches. This technique is commonly used for sports team logos on hats and jackets.
- Appliqué embroidery

Uses fabric to create a design that is then stitched onto a garment or textile. This technique is popular for adding a fabric letter or shape onto a t-shirt or tote bag.
Embroidery digitizing also offers variations and combinations of these techniques. For instance, a design may incorporate both flat embroidery and 3D puff embroidery to create a dynamic effect. Choosing the right technique for the design and fabric is key to successful embroidery digitizing. Using a high-quality digitizing software program is also essential to ensure precision and accuracy in the stitching.
Ease of Use of Embroidery Digitizing

The creation of software solutions that provide a variety of capabilities and automated technologies to streamline the process has made embroidery digitizing more accessible and user-friendly.
Embroidery Digitizing Softwares
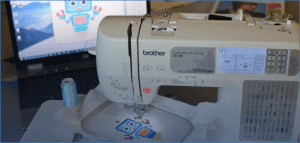
Embrilliance Essentials is among the easiest-to-use embroidery digitizing software programs. It is appropriate for both novice and seasoned users because of its straightforward design and ease of usage. Additionally, Embrilliance Essentials offers a number of automated functions that speed up digitizing and save time, like auto-digitizing and automatic color sorting. Other embroidery digitizing software programs with a good user interface include Brother PE-Design, Hatch Embroidery, and Wilcom EmbroideryStudio. They include simple user interfaces and a variety of automated tools that increase the efficiency and accessibility of embroidery digitizing for users of various skill levels.
Embroidery Digitizing Process Made Easy
Although digitizing embroidery may seem like a difficult task, there are a number of approaches to make it simpler and more accessible:
- Select the appropriate software: Available embroidery digitizing software options come in a wide variety, each with a unique set of features and functionalities. Select a piece of software that is simple to use, has a number of automatic features, and is appropriate for your degree of expertise.
- Use top-notch designs because the quality of the design you digitize will affect the outcome.
- Pick aesthetically pleasing designs that are simple to understand and manipulate.
- Simplify difficult designs: To make the digitizing process simpler, if you’re dealing with a complex design, think about simplifying it. Reduce the number of elements in the design by breaking it up into smaller pieces or by cleaning up the shapes and lines.
Best Practices for Embroidery Digitizing

Let’s consider an example – if you’re digitizing a design for a t-shirt, consider using a simple logo or a short phrase in a clear font. This will make the digitizing process easier and result in a high-quality, professional-looking final product. By following the best practices, you can create embroidery designs that are both beautiful and functional. What are they? Let’s see them one by one.
Select the appropriate fabric and thread: The fabric and thread you use can affect how your embroidered design turns out. Select materials of the highest caliber that are appropriate for your design and stitch density.
Use the proper digitizing procedures: Different digitizing processes may be necessary depending on the sort of design you are working with. For instance, you might need to employ a different digitizing process than you would for a larger design if you’re dealing with a design that features small text.
Pay attention to stitch density: When digitizing embroidery, stitch density is a crucial factor. A design that with too many stitches may appear heavy or thick, while one with too few stitches may appear thin or sparse.
Test and adjust: Before stitching your design onto the final product, test it on a similar piece of fabric. This will give you a chance to adjust the design and make any necessary changes before stitching it onto the final product.
Top-rated Embroidery Digitizing Services
There are many embroidery digitizing services available, each offering different levels of quality, expertise, and pricing. Here are some of the top-rated embroidery digitizing services:
Embroidery Designs by OESD
OESD is one of the largest and most respected embroidery digitizing companies in the world, offering a wide range of high-quality digitized designs.
Embroidery Digitizing Services
This company offers fast, reliable, and affordable digitizing services for businesses and individuals.
Absolute Digitizing
Absolute Digitizing is a top-rated digitizing service that offers high-quality embroidery designs at competitive prices.
WorldEMB
WorldEMB is a top-rated embroidery digitizing service that offers high-quality digitizing services to customers worldwide. They have a team of experienced digitizers who can handle all types of designs, including logos, patches, and even complex 3D designs. Best of all, embroidery digitizing free designs are available on their website!
Embroidery Digitizing for Beginners is as Easy as Picking a Color
Embroidery digitizing can seem daunting for beginners, but with the right approach, it can be as easy as picking a color. The first step is to choose the right embroidery digitizing software or embroidery for beginner’s kit, that suits your needs and skill level. There are various software options available, ranging from basic to advanced, with varying degrees of complexity.
When starting, it’s important to remember to take your time and not rush the process. Patience and practice are key to becoming proficient in embroidery digitizing.
Conclusion
In conclusion, beginners may learn embroidery digitizing easily and even like it by using the correct program, starting with simple designs, using the right fabric and thread, and exercising patience. You’ll be able to produce complex and lovely designs that you can proudly use on your projects with practice and patience.

A COMPREHENSIVE GUIDE TO APPLIQUE DIGITIZING
An incredible method for giving clothes character and attractiveness is applique digitizing. Our talented artisans have created a work of art in this place by
SLEEVE DIGITIZING: ADDING STYLE TO GARMENTS WITH EMBROIDERY
Small details and decorations may go a long way towards turning an average piece of clothing into an extravagant fashion accessory. Sleeve digitizing is an approach

EMBROIDERY TRENDS IN THE USA: WHAT’S HOT RIGHT NOW
In recent years, embroidery has seen a rebirth in popularity in the United States, with novel designs and patterns capturing the attention of both interior

THE BENEFITS OF LOCAL VS. OFFSHORE EMBROIDERY DIGITIZING SERVICES
Intricate patterns must be converted into embroidery machine stitch-ready files using digitizing services. Whether you own an entrepreneur with a small company or a member of a

EMBROIDERY DIGITIZING: FAQS AND COMMON MISTAKES TO AVOID
A more elegant-looking and durable solution for customization is embroidery digitizing. Customizing your clothing, bags, and other material goods with embroidery is a terrific idea. Customers

JACKET BACK DIGITIZING: MAKING A STATEMENT WITH EMBROIDERED JACKETS
Your wardrobe serves as a blank canvas on which you may paint your unique personality, sense of style, and artistic vision. It’s crucial to make