Embroidery digitizing is like weaving magic into the fabric, turning artistry into stitches. It’s the process of translating your vision into a language that an embroidery machine can understand, creating intricate patterns and designs that leap off the fabric. Embroidery digitizing is not new (sort of) – but you want to try digitizing so the first thing comes where do I start?
So, in this blog, we will see Embroidery Digitizing 101. Since, digitizing is an essential part of the embroidery process and requires a thorough understanding of stitch types, push and pull factors, file formats, and the overall embroidery process. We will cover it all in this blog post.
Let’s start!
Table of Contents
ToggleBasics of Embroidery Digitizing

Embroidery digitizing is a crucial process that transforms a physical design into a digital file that guides the embroidery machine on where to stitch and what thread design colors to use.
How to Digitize a Drawing for Embroidery?
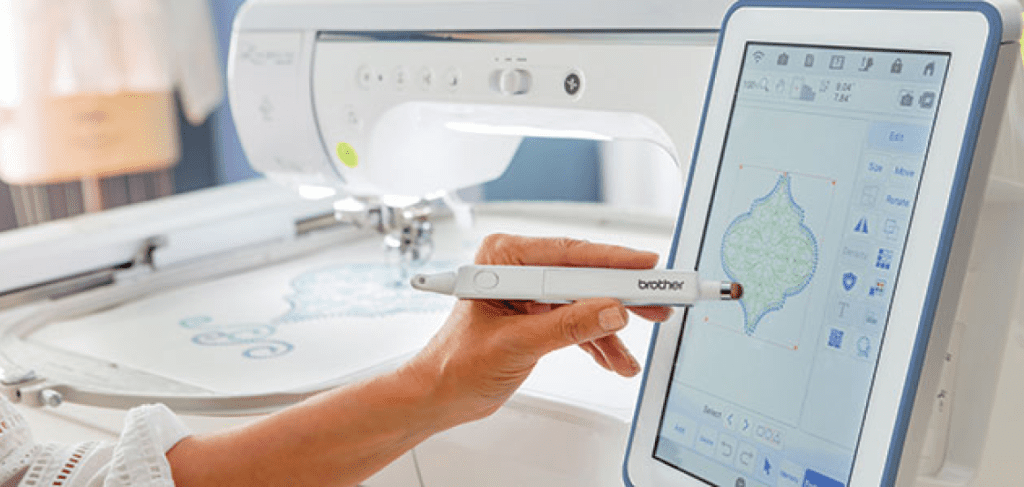
To digitize a drawing for embroidery, scan the drawing, import it into digitizing software, and use the software tools to create stitch patterns and paths for the embroidery design. Below you can see how to make custom embroidery design.
After digitizing, the file is saved in a format that is compatible with the embroidery machine, ensuring that the design is accurately reproduced on the final product. Overall, embroidery digitizing is a precise and intricate process that requires skill and expertise to create high-quality embroidery designs.
Assigning Embroidery Stitch Types

A key factor in influencing the final look and texture of an embroidered design is the choice of stitch types. Each stitch type has a distinct function and, when utilized properly, can create breathtaking visual effects.
For instance, fill stitches are good for filling out huge solid areas whereas satin stitches are ideal for generating fine letters. To get the intended result, it’s crucial to match the right stitch type to the respective area of the pattern. Hence, when choosing and assigning stitch types throughout the embroidery digitizing process, care and attention to detail are required.
The Push and Pull Factor
Push and pull forces are the physical factors that affect the fabric during the embroidery process. These forces can cause the fabric to move, resulting in a misaligned design or puckering. A common issue that arises from push and pull forces is when the fabric is pulled toward the needle during stitching, causing the design to become distorted.
To fix push embroidery, adjust stitch direction or increase stitch density, while reducing stitch density can alleviate tension for pull embroidery; rehooping may also help minimize push and pull forces in delicate designs like logos with tiny text and accents.
For a push and pull embroidered design with delicate accents and tiny text as an example, the digitizer can correct deformation and gaps by adjusting the stitch angle, using a smaller needle, and raising stitch density to reduce push and pull pressures and ensuring sharp text and crisp details.
Excited To See Our Quality?
So Why Are You Waiting For?
Order Now and GET 50% OFF On Your First Order
Embroidery Process
To achieve high-quality embroidery, check for digitizing errors, properly hoop and center the fabric to avoid distortion, and adjust the machine correctly before beginning stitching.
During embroidery, it is important to monitor the machine – which can be any such as Tajima multi head embroidery machine, and make any necessary adjustments to ensure the stitching is consistent. This includes checking the tension and thread color and making any necessary changes to the stitch length or density.
After the embroidery is complete, the fabric is un-hooped, and any excess stabilizer is removed. By following these best practices, you can ensure that your embroidery is of the highest quality, with vibrant colors, clean lines, and a professional finish.
Understanding File Formats
So what file is needed for embroidery? Different embroidery machines require different file formats, and it’s essential to choose the right format for the machine being used. The most common file format used for embroidery digitizing is of .dst. You may think, what is a dst file for embroidery? A DST file is a digital embroidery file format that contains instructions for an embroidery machine to stitch out a specific design.
Is Embroidery Digitizing for you?


Excited To See Our Quality? So Why Are You Waiting For?
Order Now and GET 50% OFF On Your First Order
FAQ’s:
Digitize embroidery using specialized software to create stitch patterns and paths for the design.
Digitize a logo for embroidery by converting it to a vector file format and using digitizing software to create stitch patterns and paths.
Learn to digitize embroidery through online courses, tutorials, or by using digitizing software and practicing on different designs.
Recent Posts

A COMPREHENSIVE GUIDE TO APPLIQUE DIGITIZING
An incredible method for giving clothes character and attractiveness is applique digitizing. Our talented artisans have created a work of art in this place by

SLEEVE DIGITIZING: ADDING STYLE TO GARMENTS WITH EMBROIDERY
Small details and decorations may go a long way towards turning an average piece of clothing into an extravagant fashion accessory. Sleeve digitizing is an approach

EMBROIDERY TRENDS IN THE USA: WHAT’S HOT RIGHT NOW
In recent years, embroidery has seen a rebirth in popularity in the United States, with novel designs and patterns capturing the attention of both interior

THE BENEFITS OF LOCAL VS. OFFSHORE EMBROIDERY DIGITIZING SERVICES
Intricate patterns must be converted into embroidery machine stitch-ready files using digitizing services. Whether you own an entrepreneur with a small company or a member of a

EMBROIDERY DIGITIZING: FAQS AND COMMON MISTAKES TO AVOID
A more elegant-looking and durable solution for customization is embroidery digitizing. Customizing your clothing, bags, and other material goods with embroidery is a terrific idea. Customers

JACKET BACK DIGITIZING: MAKING A STATEMENT WITH EMBROIDERED JACKETS
Your wardrobe serves as a blank canvas on which you may paint your unique personality, sense of style, and artistic vision. It’s crucial to make
